Sign Sign-on with Azure Active Directory (for WordPress)
A WordPress plugin that allows organizations to use their Azure Active Directory user accounts to sign in to WordPress. Organizations with Office 365 already have Azure Active Directory (Azure AD) and can use this plugin for all of their users.
- Azure AD group membership can be used to determine access and role.
- New users can be registered on-the-fly based on their Azure AD profile.
- Can always fall back to regular username and password login.
In the typical flow:
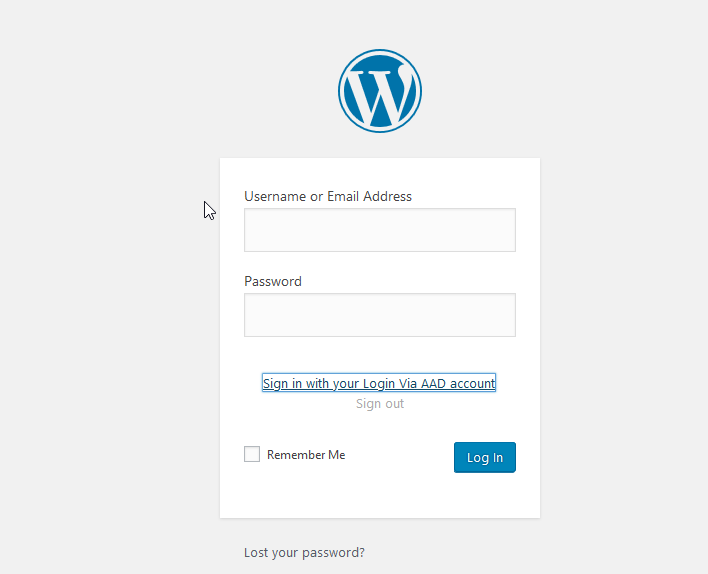
- User attempts to log in to the blog (
wp-admin). At the sign in page, they are given a link to sign in with their Azure Active Directory work or school account (e.g. an Office 365 account). - After signing in, the user is redirected back to the blog with an authorization code, which the plugin exchanges for a ID token, containing a minimal set of claims about the signed in user, and an access token, which can be used to query Azure AD for additional details about the user.
- The plugin uses the claims in the ID token to attempt to find a WordPress user with an email address or login name that matches the Azure AD user.
- If one is found, the user is authenticated in WordPress as that user account. If one is not found, the WordPress user will (optionally) be auto-provisioned on-the-fly.
- (Optional) Membership to certain groups in Azure AD can be mapped to roles in WordPress, and group membership can be used to restrict access.
Getting Started
The following instructions will get you started. In this case, we will be configuring the plugin to use the user roles configured in WordPress.
1. Download and activate the plugin
This plugin is not yet registered in the WordPress plugin directory (coming soon!), but you can still install it manually:
- Download the plugin using
gitor with the ‘Download ZIP’ link on the right. - Place the
aad-sso-wordpressfolder in your WordPress’ plugin folder. Normally, this is<your-blog>/wp-content/plugins. - Activate the plugin in the WordPress admin console, under Plugins > Installed Plugins.
2. Register an Azure Active Directory application
With these steps, you will create an Azure AD app registration. This will provide your WordPress site with an application identity in your organization’s Azure AD tenant.
- Sign in to the Azure portal, and ensure you are signed in to the directory which has the users you’d like to allow to sign in. (This will typically be your organization’s directory.) You can view which directory you’re signed in to (and switch directories if needed) by clicking on your username in the upper right-hand corner.
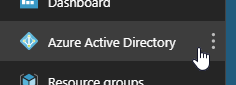
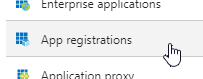
- Navigate to the Azure Active Directory blade, and enter the App registrations section.
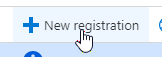
- Choose New registration.
- Fill out the initial form as follows:
- Name: Enter your site’s name. This will be displayed to users at the Azure AD sign-in page, in the sign-in logs, and in any consent prompt users may come across.
- Supported account types: Choose “Accounts in this organizational directory” if you only expect users from one organization to sign in to your app. Otherwise, choose “Accounts in any organizational directory” to allow users from any Azure AD tenant to sign in.
- Redirect URI: Leave the redirect URI type set to “Web”, and provide a URL matching the format
https://<your blog url>/wp-login.php, or whichever page your blog uses to sign in users.After clicking Register, enter the API permissions section.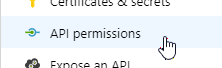
- Verify that the delegated permission User.Read for Microsoft Graph is already be selected. This permission is all you need if you do not require mapping Azure AD group membership to WordPress roles.

Note: If you do wish to map Azure AD groups to WordPress roles, you must also select the delegated permission Directory.Read.All (click “Add a permission” > Microsoft Graph > Delegated > Directory.Read.All).
Important: Some permissions require administrator consent before it can be used, and in some organizations, administrator consent is required for any permission. A tenant administrator can use the Grant admin consent option to grant there permissions (i.e. consent) on behalf of all users in the organization.
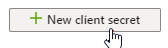
- Under Certificates & secrets, create a new client secret. Provide a description and choose a duration (I recommend no longer than two years). After clicking Add, the secret value will appear. Copy it, as this is the only time it will be available.
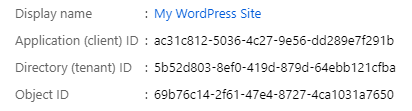
- Switch to the Overview section and keep the tab open, as you will need to copy some fields when configuring the plugin.
3. Configure the plugin
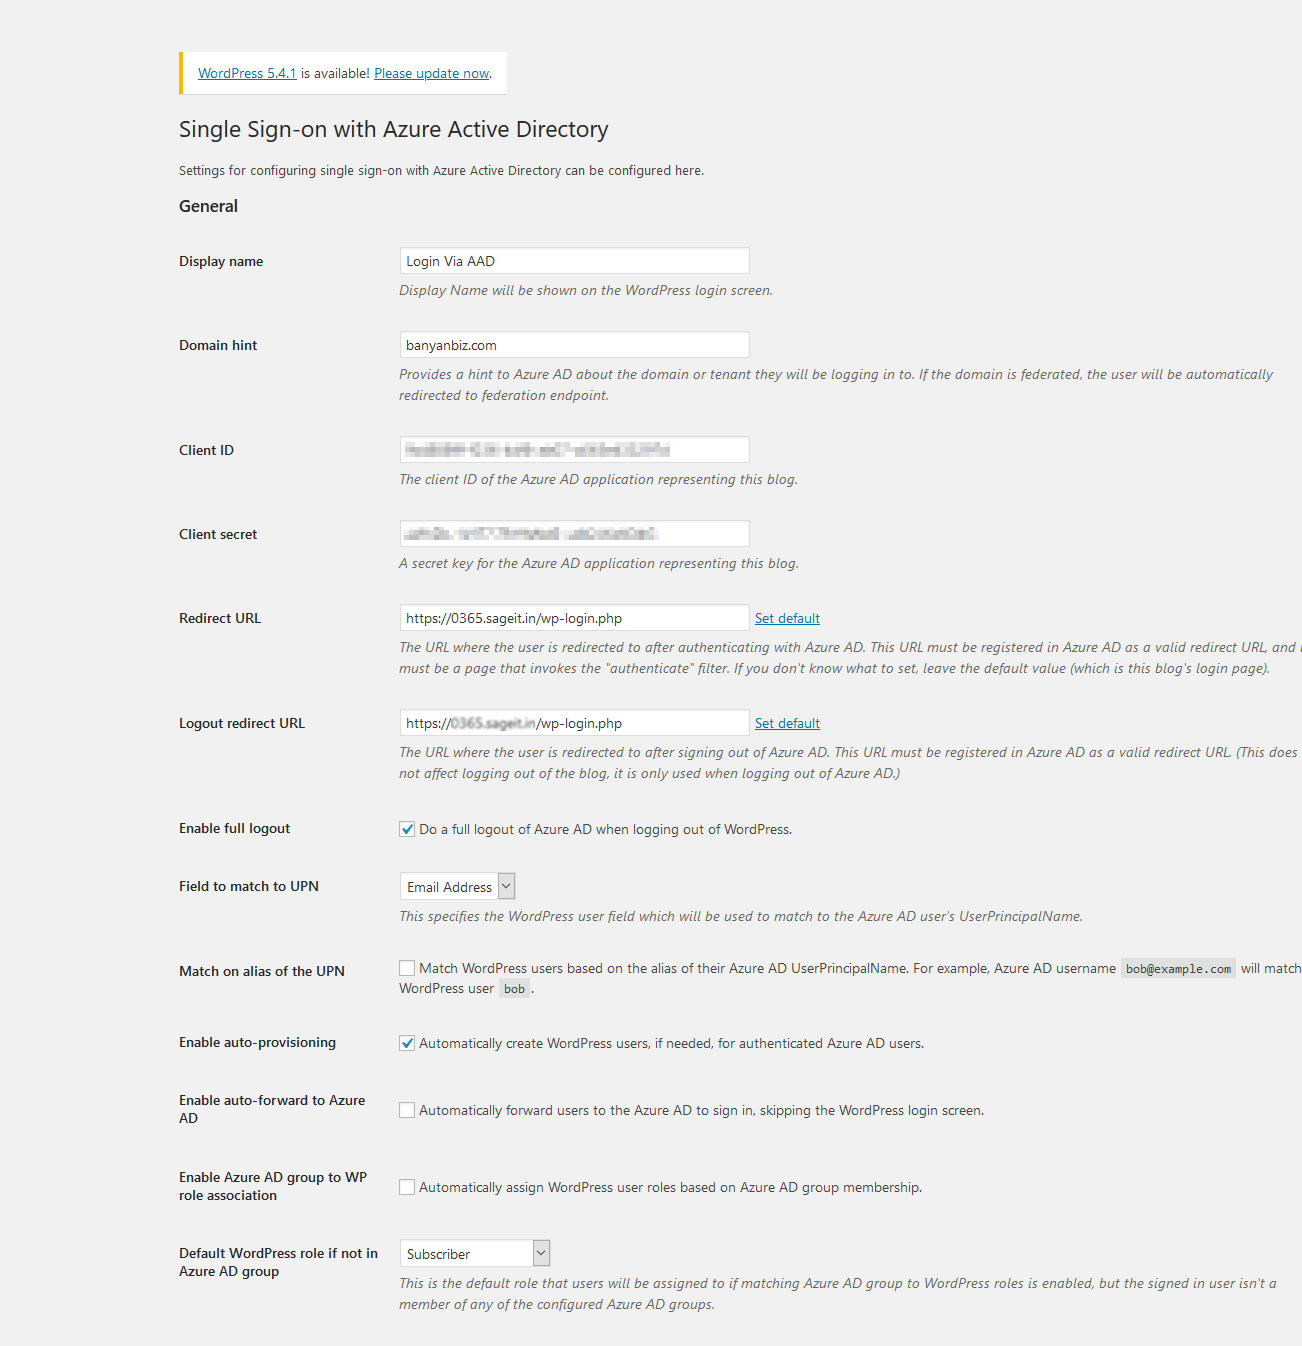
Once the plugin is activated in WordPress (step 1), update your settings from the WordPress admin console under Settings > Azure AD. Basic settings to include are:
- Display name
- The display name of the organization, used in the link on the WordPress login page which will start the Azure AD sign-in process.
- Client ID
- The Application ID. (Copy this from the Azure AD app registration’s **Overview** page.)
- Client Secret
- The client secret. (You copy this from the Azure AD app registration’s **Certificates & secrets** page.)
- Reply URL
- The URL that Azure AD will send the user to after authenticating. This is usually the blog’s sign-in page, which is the default value. Ensure that the reply URL configured in Azure AD matches this value.
Then try login with your Microsoft Account