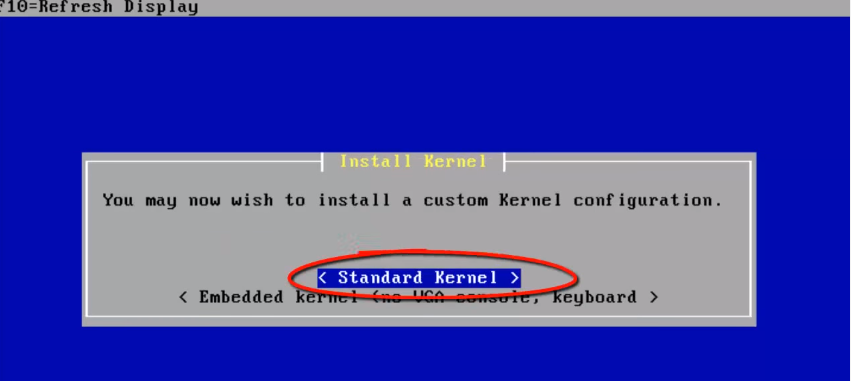
Step 11. At last for installing the kernel, you can choose from the options as Standard Kernel.
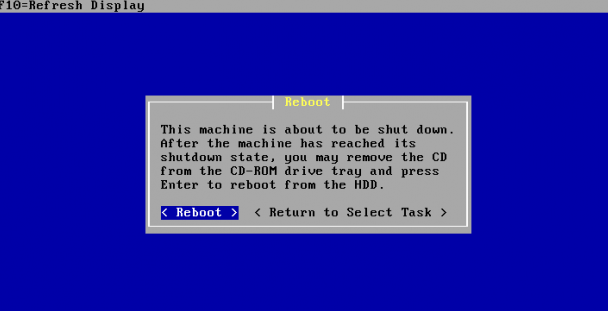
Step 12. After kernel has been installed, reboot the machine and configure the networking and more in next step as follows.
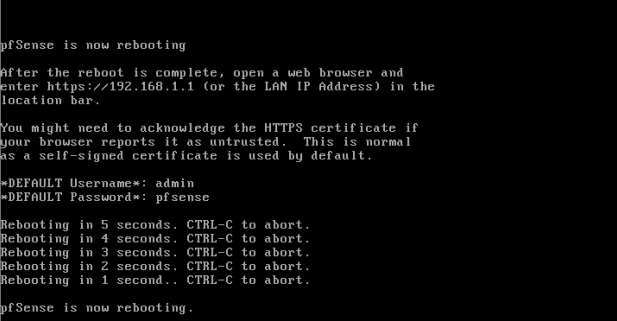
Machine Is Rebooting Now…..
Step 13. After rebooting, you will get the below screen with available interfaces to configure the network

emo–default internal Network Interface Card.
em1—External Network interface card.
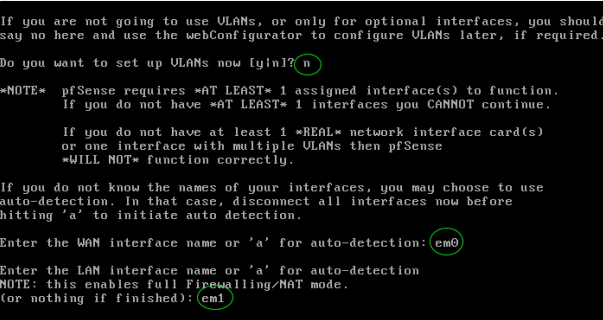
Note: The first option is presented as VLAN’s, generally VLAN’s are not needed, and they are needed for advance networking, and simply here say ‘NO’
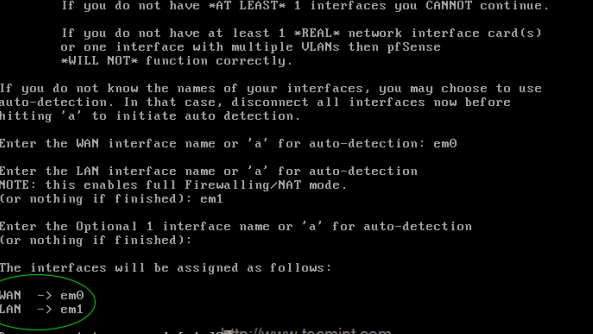
There are two interface’s emo and em1, I have planned to assign em0 as WAN and interface and em1 as LAN
Step 14. Continue by pressing Return Key. It will ask for the confirmation Yes/No proceed with Y and press enter to continue.
Step 15. After setting up interfaces, you will get the pfSense menu as show below
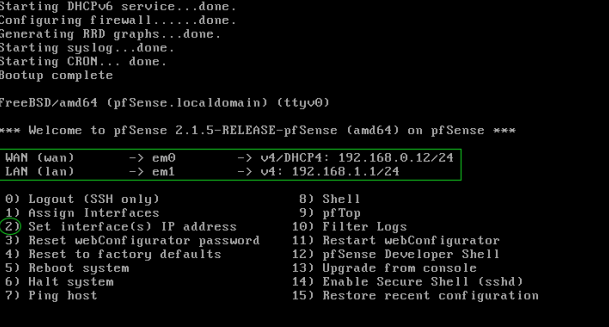
- WAN IP address will be assigned from DHCP. If you need you can assign a static IP.
- LAN IP address will be default as 192.168.1.1, if you want to change choose option 2 and set interfaces IP address.
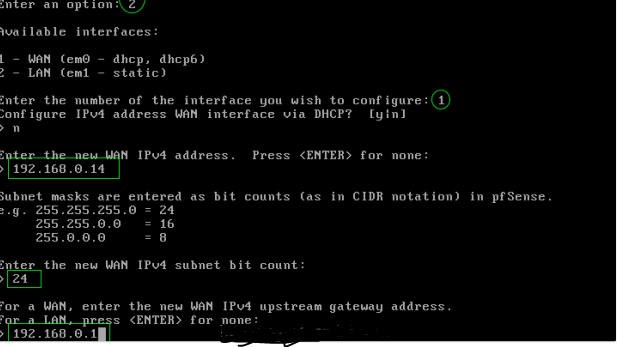
First let me define a Static IP, subnet mask in Bit count and gateway for the WAN and LAN. Disable the DHCP and continue by choosing Y
Step 16. Then for LAN interface, if we need DHCP for local area network from pfSense we can assign a range of address from pfSense
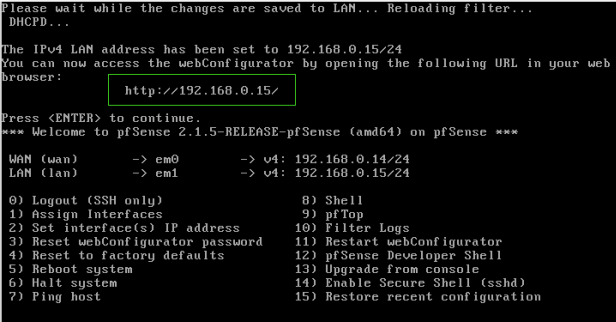
I have chosen 192.168.0.15 as my pfSense LAN address and for client machine’s I need to assign an IP address from DHCP in the range of 192.168.0.16 – 192.168.0.25
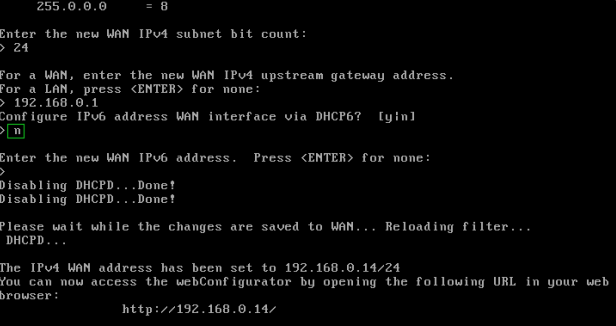
Step 17.After all the above settings are performed, it will prompt you a link to access pfSense web configurator interface to configure further steps.