
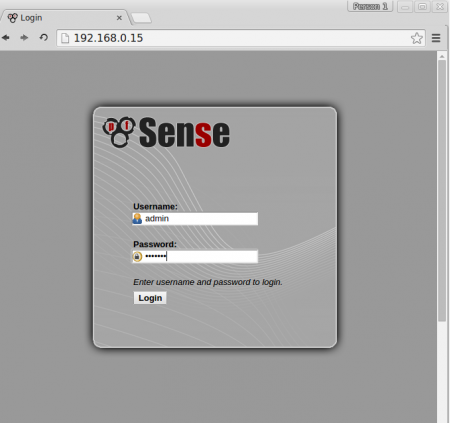
Step 18. Open the given link using HTTP protocol and enter the username as ‘admin‘and password ‘pfSense‘.
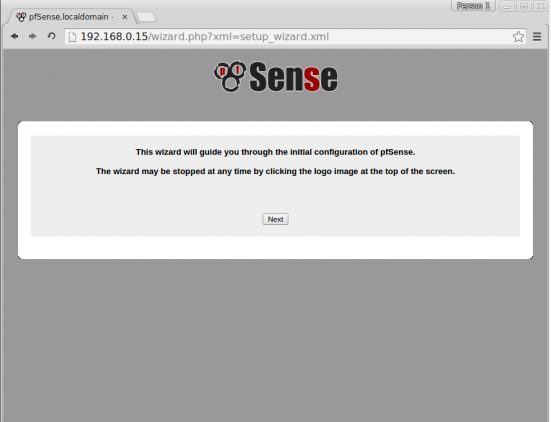
Step 19.Once you logged in, a setup wizard window appears that will guide you through the initial configuration of pfSense
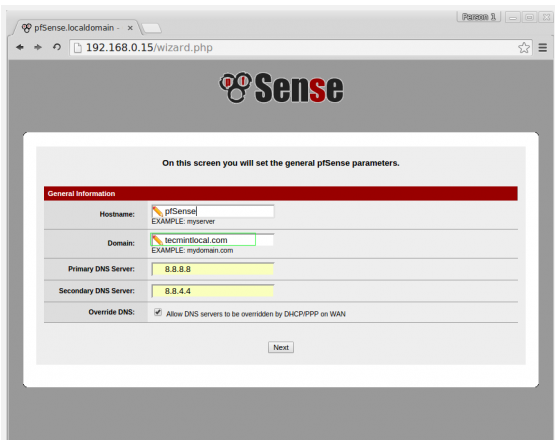
Step 20. On the next screen, enter the hostname, and domain for pfSense, by following provide a Primary DNS server and secondary DNS and click Next
Step 21. Choose the time zone and click next to configure WAN
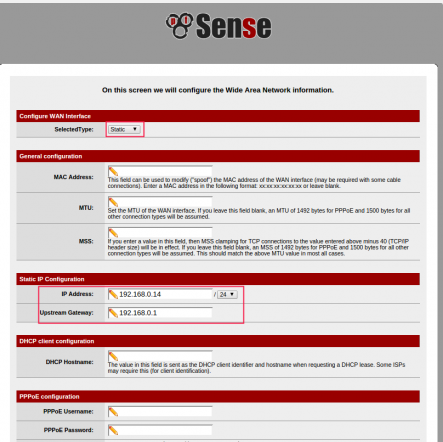
- On this screen, configure WAN interface, if you have a PPOE connection or if you need to use this pfSense machine as a router, you need to choose PPOE from the drop menu
Or
- Else simply select ‘static‘ and set the static IP address, gateway and click ‘Next‘ to continue…
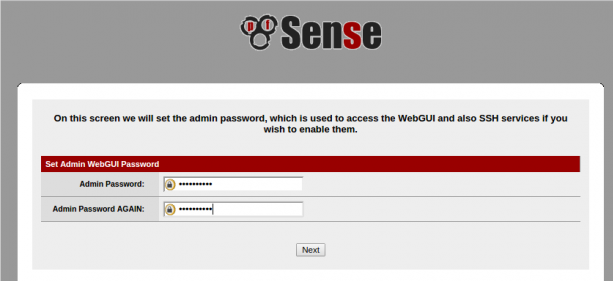
Step 22. We’ve already configured LAN network in terminal mode, just move forward by choosing NEXT.After setting admin password, click on reload to make changes.
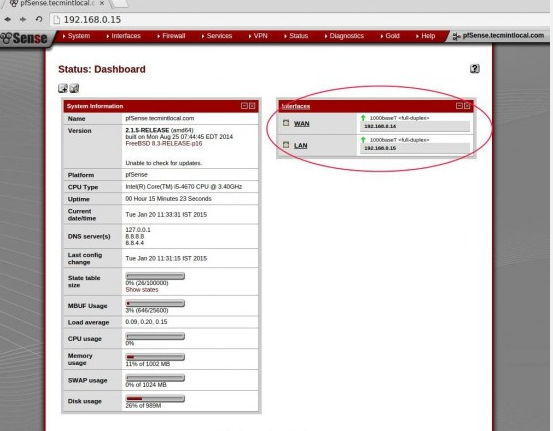
Step 23. Click on the link, will take you to pfSense Webconfigurator GUI Dashboard
Conclusion:
PfSense can be used as router or firewall with many advanced features such as traffic shaper, Load Balancer and much more. It can be used in small scale to large scale environment.